

Hi everyone! I've been trying to finish up this post for 2 days now, and here it is...finally! I posted a "sneak peek" picture on Instagram earlier this week and I have had several people asking me when this project was going to be finished, so are y'all ready?? First off, let me say that MOST of the items I used came from...drumroll please....The DOLLAR TREE!! I do not know about anyone else but, I LOVE finding craft items from the dollar store:-)
My idea all started something like this... I was checking my email one day and I had one from "Pick Your Plum" and they had this cute kit that you could purchase for like, only $3.99, where there where little wooden pieces (wooden feathers, beak, wings, etc.) that you could color and stick inside a pumpkin to make a "turkey". Talk about "bang for your buck"! You may be thinking "and the problem is WHAT?" The problem is that it would take10 days BEFORE being shipped...that timeline wasn't going to work with me, so I came up with this idea:-)
So, I had mentioned before that I got MOST of my craft items from The Dollar Tree. The only things I did not purchase from there was the scrapbook paper (you know, the endless amounts of "scraps" we all have lying around that we swear we will use one day), the edged scissors, and the glue. I used "Crafters Pick" and hot glue sticks. Talk about a budget-friendly craft! Below you will find a detailed step-by-step picture tutorial of how I made this "turkey":-)
Here is how the project started...I free-handed the shape of the "feathers" then used the first one to use as a template by tracing it on the back of the chosen scraps.

Then used the same template to use for tracing onto construction paper...

Next, I used my "Crafters Pick" glue to smother a toothpick {I decided not to use the popsicle sticks because they were not needed} and traced around the edges of the feather...
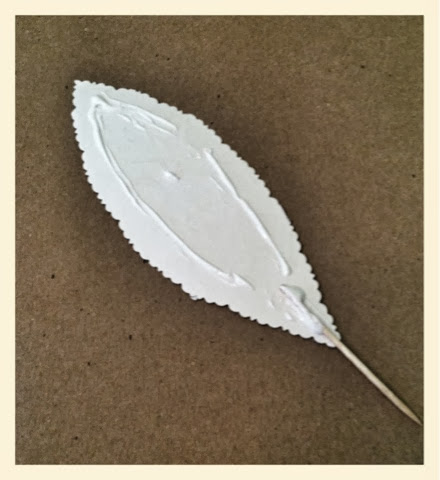
Slapped the two pieces together...


Then poked the feathers into the back of the dollar store Styrofoam pumpkin...


Next, I got creative and painted two pennies, black, to use as eyeballs{shhhh, don't tell the government I defaced U.S. currency to use for my turkey}...glued on my googly eyes, then hot glued the finished "eyeballs" to my pumpkin.

Next, grabbed my red ribbon for my turkey's beak and tied the end of it in a knot.

I really didn't like how fake the pumpkin stem looked, so I wrapped it with twine and I made a beak out of coiled pipe cleaners in the color of my choice.

And folks, we have an AWESOME TURKEY PUMPKIN!!

I must say, I LOVE this craftiness!! This is my prototype, and in a few days I will be making 3 more with my cute little niece and nephews. I think they will have fun making their own "Turkey":) What do you all think?? This would be a great addition to your Thanksgiving table:) Will you be making one with the kiddies in your family? Thanks for tuning in and I hope to see some of your turkeys, soon:)
*This project has been linked up to the Cropped Stories blog hop, The Winthrop Chronicles, House of Rose~Inspire Me Please linky party and Brag About It linky party.


No comments:
Post a Comment