
We like to PARTY!! Do you?? I don't know about anyone else, but I become an out of control, detailed, anal, DIY PARTY-CRAZED ANIMAL when it comes to the kids birthday parties around here. I mean, I literally start the "planning and creating" stage of the birthdays 5 to 6 months in advance! I can't help myself, its in my blood...and everything has to be perfect! I think this has to be some sort of sickness, I mean, really. Then, within a few hours, the party is over...all that work! lol But I LOVE IT!

I wanted to make a cool birthday banner for my son's Monster Truck Party, and I had paper medallions on the brain. I literally stalked every "pin" on Pinterest that had "Medallion" tutorials, and started creating. I have a Silhouette Portrait and I saw many awesome Silhouette Cameo tutorials, using the "perforation" tool but it would have taken more sheets of paper than I wanted to used, in order to use my Portrait. Boo...So, I just decided to do it the old fashioned way and "accordion-style" fold 2 sheets of the same colored, 8 & 1/2 x 11 paper to make one big medallion.
See below for all the details...


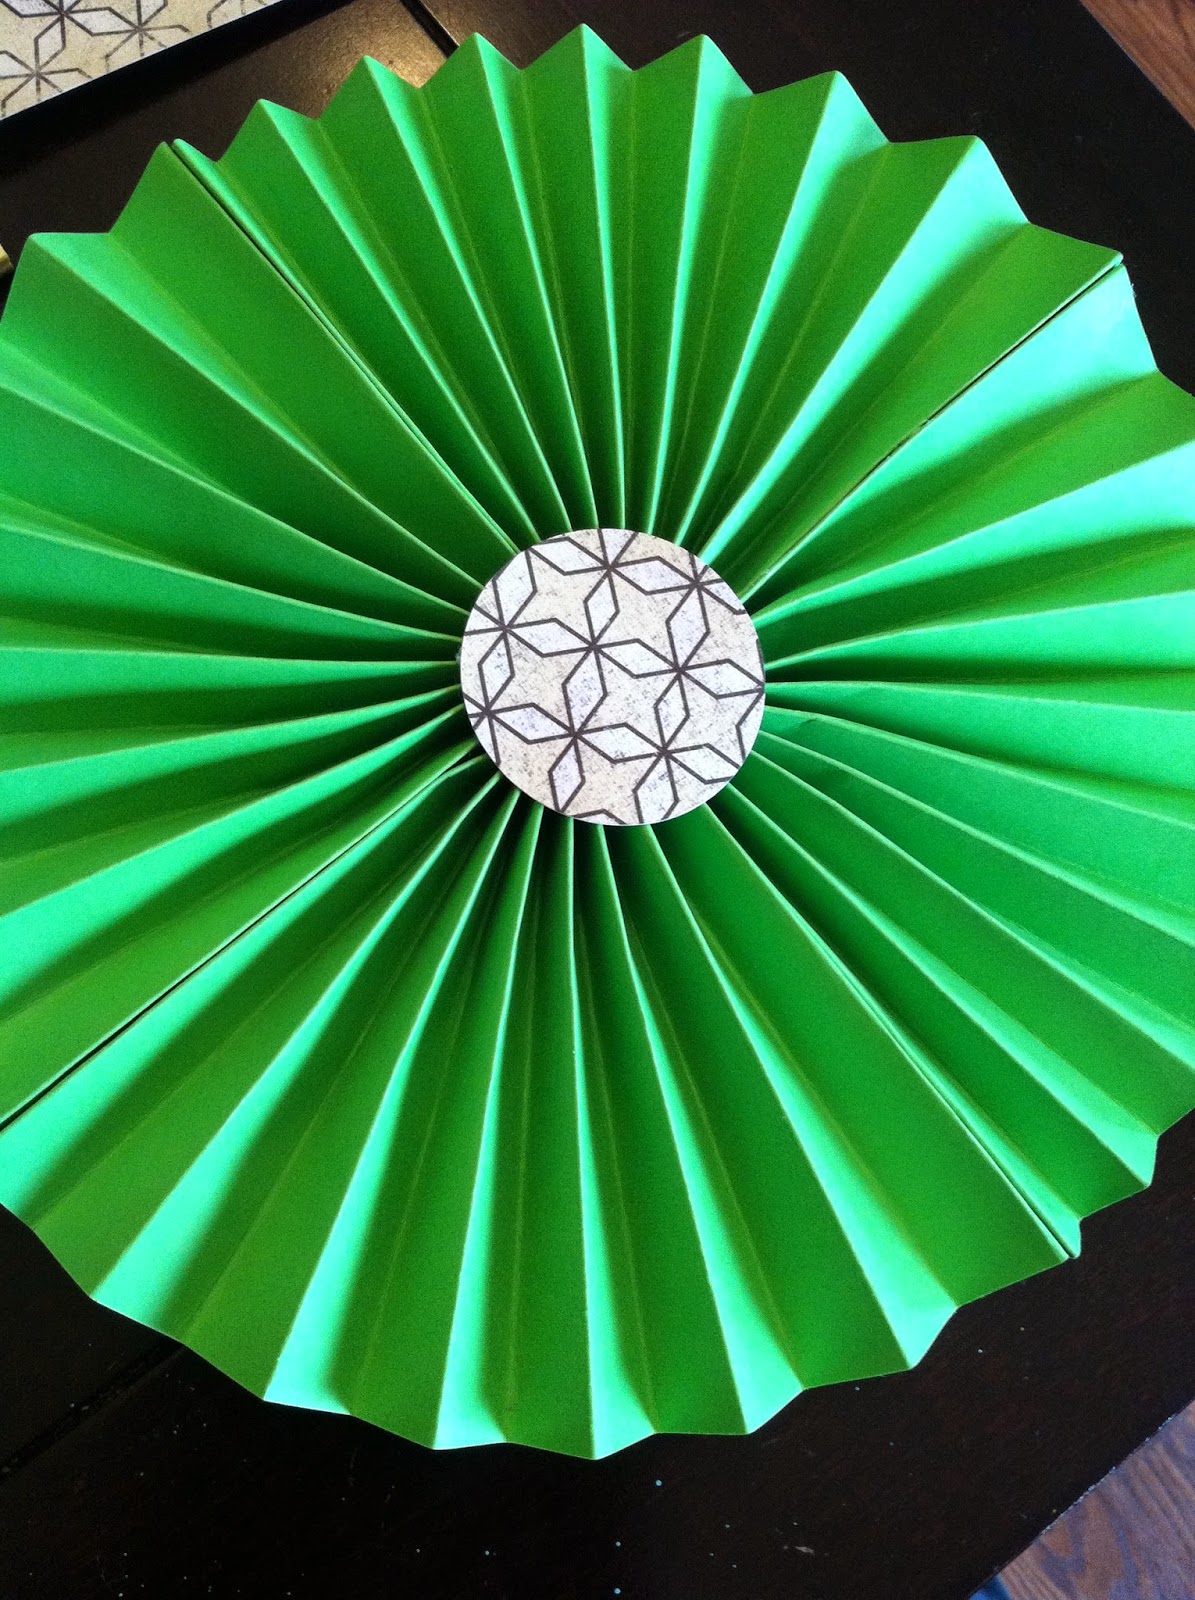
After cutting these small circles with my Silhouette, I decided I wanted 4" circles instead. So, I cut more 4" circles and then used this awesome "Vintage" font to create the letters. I made my letters 5" in size.


These took some time to make, but this is why I like to start..ahhhemmm..."early" with my party planning and DIY birthday projects. Plus, having an "almost 2 year old" is unpredictable, so my days can be different than I plan most days. :) I hope this tutorial was helpful, I am so happy with my banner! What will you make with your medallions? A banner for a birthday? Everyday wall decor for your bedroom, living room, etc? Hey, these would be super cute glued to fun striped paper party straws and used for decoration in a mason jar or something...hmmmm, I think I just came up with my next project! Have fun:)


No comments:
Post a Comment